Friday, January 11, 2019

Temporary and or Non-modal Messagebox in VBA Excel

Sometimes you want to display a non-modal temporary messagebox in VBA. Many people will tell you that this is not possible, or they give you unreliable code to use Wscript.popup.

However, there is another solution!!

Enter in the simple one-line solution for Windows 7, 8 and 10. I think it is applicable to all versions, but it may only be the Professional versions. You will have to test that on your own.

Here it is!


 Dim myMessage as String  
 Dim myDelay as Integer  
 myMessage = "This message will self destruct in 8 seconds!"  
 myDelay = 8  
 Shell "msg /TIME:" & myDelay & " " & Environ("Username") & " " & myMessage  

Just place this code wherever you want to send a temporary message.  You can change myDelay to the delay (in seconds) that you want (or remove "/TIME:" & myDelay & " "" altogether). You also just modify myMessage to be the message you would like! (Don't forget to use escape characters for quotation marks)

This will create a nice and simple messagebox with your message. The messagebox will disappear after your specified delay time. It will also not inhibit the VBA code from continuing. That means, you can show a message to the user while processing other things!

You're Welcome!

Tuesday, January 8, 2019

Automatically Convert Base64 to Binary on Double-Click

Okay, so this one doesn't include any direct VBA code, but hear me out.  I have programmed (in VBA) SOAP web service clients.  It is common practice to encode information with JSON or XML when sending and receiving such requests.  Sometimes, you even need to download data. Since these web services are usually in text format, they often send and receive data via base64 encoded data.

I custom coded a base64 decoder to pull information from these SOAP requests, convert them to binary, and output to a file. This works great, and is relatively quick!  However, I AM able to speed up the process by using windows' built-in base64 decoder "certutil".

I then realized, I can make a quick batch file which will do all the hard work for me and automatically decode a file.  I just needed to make sure that the file was actually base64.  I found myself renaming all of my base64 encoded files to myFile.txt.b64.

As you may know, base64 does not contain file type information. In order to overcome this, I included the original extension (.txt in this case) followed by a new extension (.b64). Let's go ahead and use this for our project!

So... what to do next? Make a batch file!  I opened up notepad (well... notepad++ actually) and made a cute little batch file. The code can be seen below:

 @ECHO OFF  
 certutil -decode %1 %~n1  
 %~n1  
 del %~n1  

I have 4 simple lines, let's break them down:

  1. (optional) Don't show us a bunch of stuff in the command prompt. 
  2. Decode the file passed as an argument into the batch file. Note: %1 means argument number 1, and %~n1 is a neat little trick which returns the argument without the extension. This is perfect for us! Since we are essentially using two extensions, we strip off the b64 extension in favor of the true extension
  3. Open up the decoded file
  4. (Optional) Delete the decoded file when finished. If you want to keep your file in a decoded format, be sure to remove this line! Optionally, you can modify %~n1 to be %1. Then we remove the base64 encoded file and only keep the decoded file (might be better in the long run since base64 files are larger than their binary counterparts)
Warning! 
Okay, so here's a problem. If we already have a file named myFile.txt in the same location as myFile.txt.b64 then we will end up deleting the possibly very different file called myFile.txt. To remedy this, I have modified the code slightly down to two lines.

 @ECHO OFF  
 certutil -decode %1 %~n1 && %~n1 && del %~n1  

This is better! The && makes sure that the delete function doesn't run unless opening the file works correctly and THAT won't run unless the file is properly decoded (which will fail if the file already exists). Edit: Turns out this doesn't actually work. There is no return true indicator to the command prompt that signals to the batch file that it's okay to delete file file. If you use this method del %~n1 will never run. Perhaps try the following code instead:


 @ECHO OFF  
 certutil -decode %1 %~n1  
 if NOT ["%errorlevel%"]==["0"] (  
   exit  
 )  
 %~n1  
 del %~n1  

This should exit our script if we have an error when decoding, thus preserving any files that may already exists.

Phew! Look at that! Now all we need to do is associate the file extension .b64 with our new batch file. So go ahead and save your batch file. I saved it in My Documents and called it "convert64ToBinary.bat" (note: the .bat extension is absolutely necessary).

In Windows 7 and up, this is quite simple. Just double click on your .b64 file and click "Open With."  At this point, we go to My Documents and click on the "convert64ToBinary.bat" file. Now all files with the .b64 file extension will open automatically with our batch file!

This is great news. You no longer need to convert base64 encoded files. Simply save the base64 encoded data in a file with two extensions, first the original extension and then .b64. Then you can simple double-click to open the file.

Here's a good alternative full code for the batch file. It keeps your decoded file and opens it and closes the pesky cmd window. As an added bonus, it will pause and show you any error that has occurred if the file wasn't successfully decoded.

 certutil -decode %1 %~n1  
 if NOT ["%errorlevel%"]==["0"] (  
      pause  
   exit  
 )  
 start %~n1  

Friday, November 30, 2018

Maintain aspect ratio of window Excel VBA with auto resize (zoom)

Have you ever created a cool application or spreadsheet in Excel?  Some of you may have even taken steps to remove the ribbon and status bar so that the user must use the program as you intended it.

The problem with this, is you might end up with the user resizing the window and seeing cells outside of the bounds that you want them to view.

Another problem you might run into, is you have users who wish the window to be larger or smaller on their screen.  To fix this issue, add this VBA code to your Excel program. Don't forget to also add a reference to this code in the Workbook_WindowResize function.

Note: This code works best in office 2016. Earlier versions of office don't trigger the Workbook_WindowResize event when the application window changes size. To fix this, you can run this subroutine recursively with an application.ontime, or you can add it to another event such as Workbook_SheetSelectionChange.

Tuesday, August 21, 2018

Looping through files in a Folder Excel VBA

I can't tell you how many times I have written an Excel VBA program that requires me to loop through various files in a folder!  In the past, I have used a file system object to do it, but I just recently discovered a new way to do it!  The solution is simple: use Dir!

As it turns out, Dir() allows you to use wildcards to access file names in a given folder. In order to get through each item in the folder, you simply run the Dir() command again with no arguments. It's easy, simple, fast, and effective. This is great when you want to search for a file within a folder in VBA, but you are not sure what the file will be called.

Use the following code to loop through files in a folder

 Sub LoopThroughFilesInFolder()  
      'Example Code BizzareExcelTips Blogspot  
      Dim sDirectory as String  
      Dim sFileName as String  
      sDirectory = "C:\*" 'Enter your folder path here with a wildcard (*) at the end  
      'get the filename (and make sure the file exists)  
      sFileName = Dir(sDirectory)  
      'The loop  
      While len(sFileName) > 0  
           'Your code  
           Debug.Print sFileName 'Do something with the file here  
           sFileName = Dir       'Get the next file  
      Wend  
 End Sub  

That's it! Nice and easy! Enjoy!

Tuesday, January 23, 2018

VBA Pomodoro Timer

While learning about how I can improve my knowledge and myself, I discovered something called the pomodoro technique. Pomodoro is the italian word for Tomato, and the technique was named such because the creator, Francesco Cirillo, used a tomato shaped timer.

If you are unfamiliar with this technique, it is pretty simple. You write a list of things you wish to get done. After that you set a timer for 25minutes and work on a single one of your items until the timer is finished. If you finish your task before the timer is up, you continue to work on bettering yourself or improving your work until the timer is up. Once the timer is up you take a short, 3-5 minute break. Every fourth break, however, is a longer break--about 15-30 minutes. You then reset the timer and move on to your next item. This is repeated until all of your items are complete (or your work day is over).

Well, oddly enough, this technique is nearly identical to the technique I have found for myself and used through college. I was using a proven time management technique without even knowing it!  After discovering the pomodoro technique, I decided to write some VBA code to create my very own timer.

The code file can be downloaded HERE. (Right-Click -> Save As)

The code is simple, I created a new module and 4 subs. First, I start with some global variables.


 Public iSets As Integer  
 Public iPomodoros As Integer  
 Public nextTime  


Note: These do not have to be public, that will depend on you. You could alternatively use static variables in your subroutines as well.

Then I create the four subs:

  1. start
  2. incrementSet
  3. incrementPoms
  4. Finish

The method I use to set off the timer is application.ontime. I set it to run 25 minutes after the user clicks the OK button on the messagebox. After 25 minutes, my incrementPoms routine is run. There the user is prompted to take a short or long break (depending on how many Pomodoros they have done).

Once the user is done, they simply run the "Finish" sub. This will stop the process and display how many Sets of 4 Pomodoros was completed along with the number of Pomodoros left over.

To run this macro, you can either type in the immediate window, use the Macro dialog box in Excel, or create your own fancy buttons which refer to each macro (One for start, the other for Finish).

That's it!


 '--------------------------------------------------  
 '--------------------------------------------------  
 'Pomodoro technique timer. Written by Lance in VBA  
 'use to increase your productivity.  
 '--------------------------------------------------  
 '--------------------------------------------------  
 '  
 '  
 '       Directions for use  
 '__________________________________________________  
 '1. Create a list of items you wish to complete  
 '2. Run the "start" subroutine  
 '3. Begin working on the first item and work on  
 '  that item exclusively until the timer is up  
 '4. When the timer finishes, take a break as  
 '  directed. Move on to another item on your  
 '  list. If you have not finished the work on  
 '  your current item, come back to it during  
 '  another pomodoro.  
 '5. When your list is complete, run the "Finish"  
 '  subroutine.  
 '6. Enjoy having completed your To Do list!  
 '__________________________________________________  
 Public iSets As Integer  
 Public iPomodoros As Integer  
 Public nextTime  
 Sub start()  
   'reset our variables  
   iPomodoros = 0  
   iSets = 0  
   'prepare the user  
   ans = MsgBox("Are you ready? Make sure you have your list of items!", vbYesNo + vbQuestion, _  
          "Ready?")  
   'if yes is clicked then  
   If ans = vbYes Then  
     'prepare, OK will start the timer  
     MsgBox "Your time will begin when you click OK!"  
     'set our next time value  
     nextTime = Now() + TimeValue("00:25:00")  
     'schedule our next pomodoro  
     Application.OnTime nextTime, "incrementPoms"  
   Else  
     'when the user clicks no  
     MsgBox "Okay, Come back when you are ready to begin"  
   End If  
 End Sub  
 Sub incrementSet()  
   'reset the pomodoros  
   iPomodoros = 0  
   'increment our sets  
   iSets = iSets + 1  
   'take our 15min. break  
   MsgBox "Take a 15-30min. Break. Then switch to a new task and click OK to start the timer again"  
 End Sub  
 Sub incrementPoms()  
   'increase the count  
   iPomodoros = iPomodoros + 1  
   'if we have a new set then make it  
   If iPomodoros = 4 Then  
     incrementSet  
   Else  
     'let us know we need a small break  
     MsgBox "Take a short break, 3-5minutes." & _  
         "Then switch to a new task and click OK to start the timer"  
   End If  
   'set our next time variable  
   nextTime = Now() + TimeValue("00:25:00")  
   'schedule the next pomodoro  
   Application.OnTime nextTime, "incrementPoms"  
 End Sub  
 Sub Finish()  
   'Let's see how well we did!  
   MsgBox "Congratulations! You completed " & iSets & " sets plus " & iPomodoros & " Pomodoros"  
   'cancel the next pomodoro  
   Application.OnTime nextTime, "incrementPoms", schedule:=False  
 End Sub  


Monday, January 22, 2018

Auto Zoom in VBA

We Excel users can often be pretty technologically minded. We like multiple monitors, or big wide screens.

Sometimes we create a superb workbook and we decide to share it with someone else. The problem is, though, that sometimes their monitor does not display the page as well as we would like it to.

There is a neat trick to automatically set the zoom to the appropriate size based on the screen size.
------------------------------------

The first step is to create our workbook. Make it whatever size you think looks nice on your screen. If you think it looks best full screen, make it full screen.

Next, you need to find out what the window size is for your workbook. In the immediate window, type the following:

?application.height

?application.width


Make note of the numbers that result from it. For our example, let's say we got the results, 600 height 400 width.

Next we create a new VBA module and place the following code in it. After the code has been inserted, you must change the variables "orig_Height" and "orig_Width" with the numbers we got in the previous step. In our case this is 600 and 400 respectively.


Public Sub autoZoom()
    'Checks the size of the application and scales it
    'according to the size of the original workbook
    
    'Resume next on error because
    'this subroutine will be run
    'at various times and we don't
    'want it to interrupt the use
    'of our workbook
    On Error Resume Next
    
    Dim orig_Height
    Dim orig_Width
    Dim cur_Height
    Dim cur_Width
    Dim diff_height As Single
    Dim diff_width As Single
    
    'change this to the proper height
    'and width at 100% Zoom
    orig_Height = 600
    orig_Width = 400
    
    'These are set based on the current information
    cur_Height = Application.Windows.Item(ThisWorkbook.Name).Height
    cur_Width = Application.Windows.Item(ThisWorkbook.Name).Width
    
    'this checks to make sure we are using the
    'current workbook. This can be changed if
    'you want, but it's helpful so that we don't
    'scale the wrong workbook
    If ActiveWorkbook.Name = ThisWorkbook.Name Then
        'this is where we automatically change the zoom
        'We have to base it on either height or width
        'So we run a quick calculation to see which one
        'to use
        diff_height = Abs(orig_Height - cur_Height)
        diff_width = Abs(orig_Width - cur_Width)
        
        'if the height difference is less than the width
        'difference, then we use the height to scale the
        'window. Otherwise, we use the width
        If diff_height < diff_width Then
            'set the zoom
            ActiveWindow.Zoom = (cur_Height / orig_Height) * 100
        Else
            'set the zoom
            ActiveWindow.Zoom = (cur_Width / orig_Width) * 100
        End If
    End If
End Sub

Now you need to navigate to the workbook module and create a new event workbook_open (or whatever other event you wish to link this to) Then you simply type autoZoom wherever you want the code to automatically set the zoom.

Viola!
--------------------------------
This code works by creating a ratio of your current window size in comparison to the window size that looks good on the original monitor. It multiplies this ratio by 100 to set the zoom to the proper number.

Friday, January 19, 2018

Optimize Your VBA Code

Have you ever created a VBA module only to find that the subroutines and functions therein were incredibly slow?

There are a few things you want to look for in order to speed up your code.  Using a simply google search, you can find information about more advanced things like Storing data in a variant array (don't loop through cells!). However, I'm going to show you a few simpler techniques that I use when coding in VBA.

The first thing I do is use optimizing code. I have written two very simple subroutines which I call at the beginning and end of my code respectively.

First:

 Sub Optimize ()  
   'Run this before the slow code runs  
   Application.ScreenUpdating = False  
   Application.Calculation = xlCalculationManual  
   Application.DisplayAlerts = False  
   Application.AskToUpdateLinks = False  
 End Sub  

and then:

 Sub deOptimize()  
   'Stops Optimization, run before exiting sub or function  
   '(after code runs)  
   Application.ScreenUpdating = True  
   Application.Calculation = xlCalculationAutomatic  
   Application.DisplayAlerts = True  
   Application.AskToUpdateLinks = True  
 End Sub  

The important thing to note here is that you MUST run the deOptimize sub after  you are done. Otherwise, the user will run into some very annoying problems.

Another thing I do is look for points where my code calls for something else to happen. That could be running additional subroutines or functions, or calls to the windows API.

When you run code that is process intensive, Excel has a tendency to hang. A user might think that Excel is unresponsive and choose to end it.  Sometimes while Excel is hanging, it is also trying to complete another task in addition to your code.  (This can happen during long loops, for example.)

The solution is simple, but you must be careful with how often you use it. It is a simple line:

 DoEvents  

This will pause your code for a brief moment while the computer uses its processing power to process other things it is doing.  This will then open up more processing power for your code and can speed up certain processes. When used excessively, however, it can have the opposite effect and slow it down.

There have been big speed problems when it comes to Pivot Tables and Camera objects. If you need to use these things, you may not have a good way of speeding things up. Make sure you aren't calculating your Pivot Tables each time the smallest update occurs. Camera objects have no mercy, and it is better to avoid them and go with better "Dashboard" tools instead.

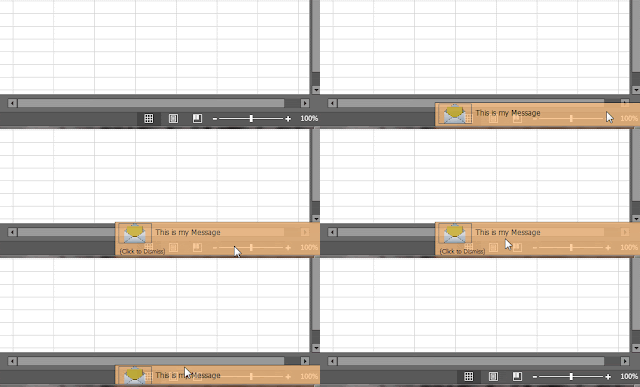
VBA Add an animated Notification Box to your Excel Program

For those of us who create programs and add-ins in Excel, we are very, very familiar with the message box.  The message box gives us the opp...